ShaRepair Workshop #3
Project Case Study: Enhancing a Dishwasher Power Switch Enclosure
On 11th June, PrintCity once again played host to an online workshop to further knowledge in the repair of common household appliances under the banner of ShaRepair, the Interreg (North West Europe) funded project that aims to decrease waste from electrical and electronic equipment (WEEE). PrintCity is supporting this initiative in a number of ways; one of which is to provide educational events with European repair cafes to help onboard them with CAD and 3D printing.
This third workshop was hosted by Gary Buller, (Technical Team Leader: PrintCity) and delivered by Peter Gough, MSc Industrial Digitalisation programme leader at Manchester Metropolitan University.
The focus of this workshop was enhancement. For many repairs, users tend to look for ‘like-for-like’ replacements and these are typically what can be bought online. However, the fact that people are looking for a replacement suggests the original part had underlying problems, so buying the same part brings the same eventual problems.
But what if, instead of ‘like-for-like’, we could make the part better than the original: enhance it by identifying what went wrong and taking steps to remedy it?
Pete started by explaining how his integrated dishwasher had broken and the immediate response from his wife was to look for a new one. This is quite typical of many people as they automatically feel they don’t have the skills or know-how to fix things. However, access to online tutorials, parts and assistance is ubiquitous and quick. The problem, in this case, was that the main power button located at the top of the door was fully depressed into a cavity and could not be retrieved meaning the dishwasher could not be started. Before investigating the problem and assuming the switch was broken, a new one costing £15 was ordered, together with a replacement power button.
The repair started by turning off the power then driving a self-tapping screw into the power button and withdrawing it with a pair of pliers. This effectively destroyed the button but there was no other way of retreiving it. The integrated cabinet door was removed by taking out all the screws inside the dishwasher door and this gave access to the facia panel.

The retrieved power button, now damaged 
The switch enclosure had broken due to the downward force on the power switch over time 
The power switch had fallen inside the facia panel
Once access to the panel had been achieved, it became clear that the power switch was not actually broken but the housing that enclosed it had shattered and the switch had been pushed through it. On examination, the part was extremely thin at around 1mm and looked very fragile. A new facia panel was sought but could not be found online but then a new idea cam to mind …
What if we could just make a new enclosure for the old switch but make it better and stronger than the original?
Peter Gough: MMU: ShaRepair
The switch was removed and some measurements were taken with callipers. A simple sketch identified the main dimensions and this was taken into Autodesk Fusion 360 CAD software. From the outset, the 3D print direction (how it would be made) was considered to remove or reduce the amount of support material that would be required: this is known as ‘Design for Additive or DfAM.
Bearing in mind how weak the original part was, the bottom part of the enclosure was thickened to 3mm to ensure it could resist years more button pushes. From the CAD model, a sample print was made using PLA (Polylactic Acid) filament. The print was paused when it was about 8 mm tall as a problem had occured in that the corners had started to peel upwards. This can be a problem as this is the material that is in contact with the heated build-plate on the 3D printer.

A quick sketch to record the dimensions 
Model created in CAD 
Prototype (failed print) to check fit
Despite this, there was enough material to check the fit with the switch body and the recess it was intended for on the dishwasher facia panel…

Checking the fit with the switch body 
Checking the fit in the dishwasher facia panel
The CAD model was then thickened up in areas that would accept screws. The slicing software (Ultimaker Cura) confirmed that no support material was needed and the enclosure was 3D printed but with the addition of a raft around the part to counter the edge/ corner peeling from the first prototype.
The part was fitted to the dishwasher and the switch was hot-glued into place. On the same day, an email was received that said that the power button was no longer available and a refund for it had been made. Armed with some callipers, a copy was made in Fusion 360 and 3D printed in bright red PLA and fitted onto the switch.
Both 3D printed parts were made using materials that totalled 42p. From the initial expected cost of £20, this represented a saving of around 98%.

New power button made 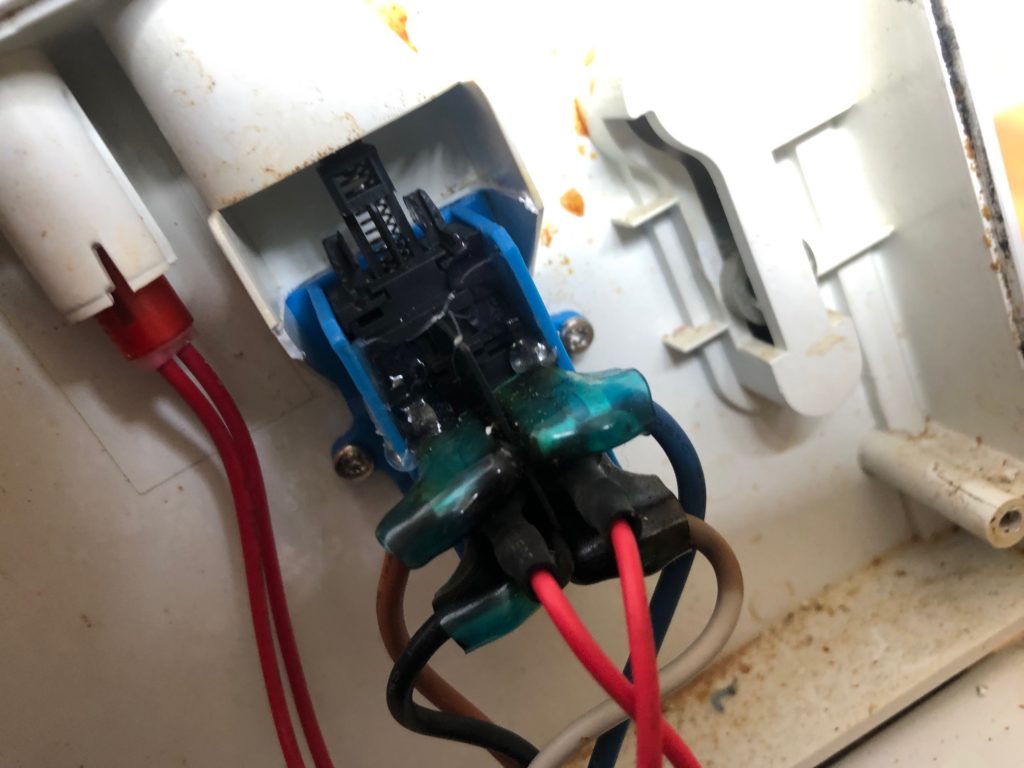
Final enclosure fitted into dishwasher 
Fitted button to complete the repair
The benefits of enhancing original parts to provide better solutions was shown and, of the 13 people present, we had some excellent feedback as seen below:
Thanks for this informative webinar – in fact for all three of them – and hope to be attending future ones.
Thank you very much for this workshop, very inspiring. Your workshops have given Repair Together (BE) the desire to organise a workshop on repairing with 3D printing in French soon
That was excellent, thanks so much!
Look out for announcements about ShaRepair Workshop #4 or contact Gary Buller to add your name to the mailing list.
Get in touch
If you're interested in working with us, or have questions about studying with us please get in contact.
Related Blog Articles